

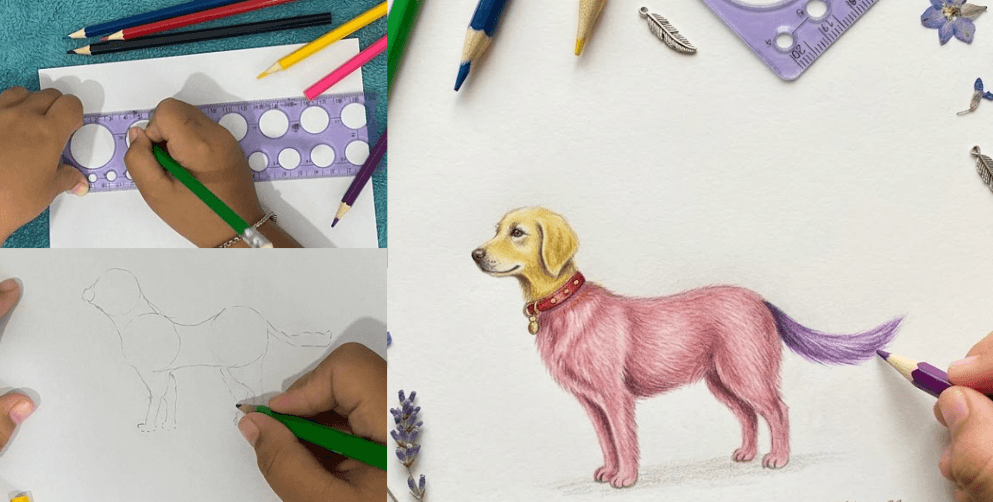
Hello to all the moms and dads out there! Have you ever experienced something like this?
Your little one walks up excitedly, asking for a piece of drawing paper, eager to draw a cute little puppy. But just five minutes later, that bright, smiling face turns into a sad frown.
With an eraser in one hand, scrubbing so hard the paper almost tears, she starts complaining: “Mom! I can’t draw it! Why does its body look like a block of wood, and why is the head so much bigger than the body?”
Sound familiar? If you have been searching for a way to do an easy dog drawing for kids, step by step, you are definitely not alone.
As a mother myself, I understand this feeling completely. Watching your child get disappointed while trying to create something beautiful makes you want to jump in and help. But sometimes we just do not know how to explain it in a way that actually clicks for them, other than saying, “It’s okay, sweetie, if you keep practicing, it will look beautiful.”
Today is different, though! After a lot of trial and error with my own daughter, I found 5 unique, practical drawing tips made specifically for 8-year-olds.
I have tested every single one of them at home, and the photos throughout this article are real pictures of her working through each step.
These techniques will turn your child’s drawing session from an erasing marathon into something they actually feel proud of.
Key Takeaways
Here is a quick summary of what you and your child will get from this guide:
- Starting every dog drawing with 4 light circles fixes the most common problem kids face: a head that ends up way too large for the body.
- Holding the pencil in the middle of the barrel (the “whisper grip“) creates lighter lines that are easy to erase, which removes a huge source of frustration.
- A dog’s back legs have a natural S-curve, like a macaroni noodle. Drawing them that way instantly makes the dog look realistic rather than stiff.
- Short zig-zag pencil strokes along the body edges create fur texture without any complicated shading skills.
- Leaving a tiny white dot inside a colored eye (a “catchlight“) makes the dog look alive and full of personality.
- All you need is blank paper, a pencil, and colored pencils. A circle stencil ruler is optional but very helpful for kids getting started.
- These 5 tips make a wonderful drawing activity for 8-year-olds at home, and they also transfer to other animals once your child gets comfortable with the method.
What You Need
The best part about this activity is how little you need to get started. No expensive supplies, no special art room. Here is the full list:
- Blank white paper
- Pencil
- Colored pencils
- Circle stencil ruler (optional but recommended for younger kids)
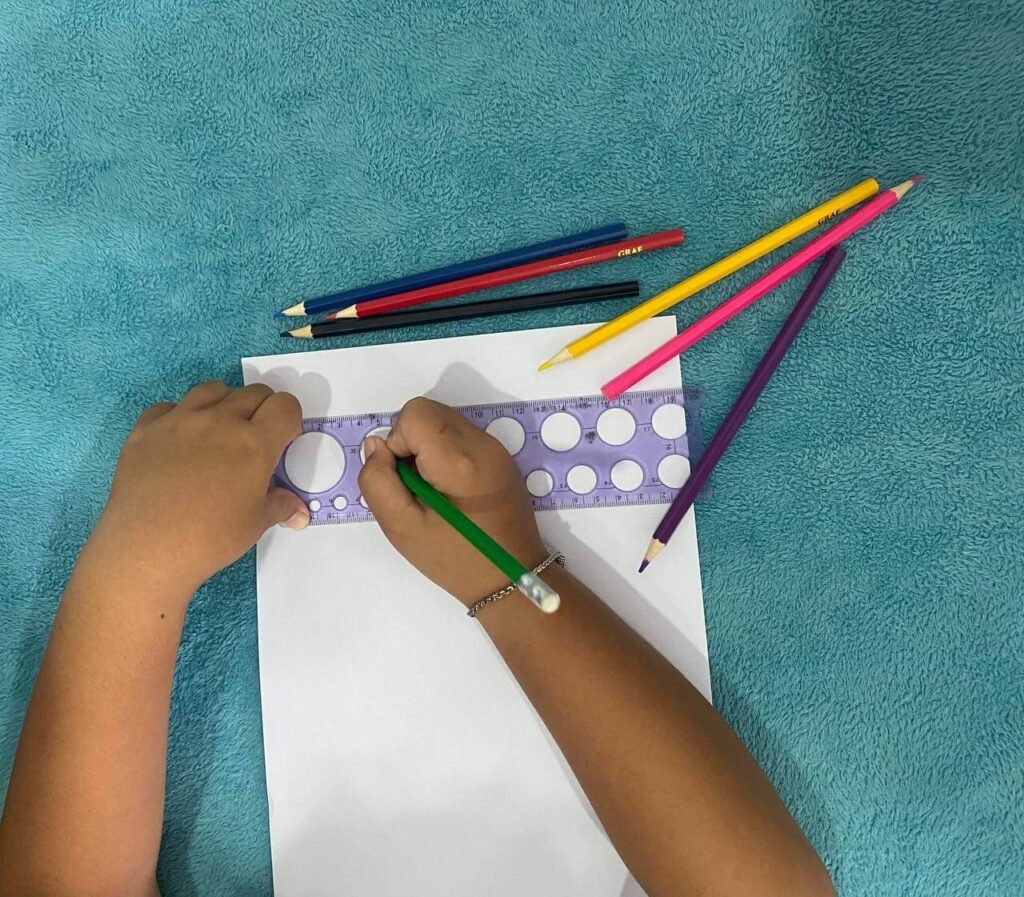
The circle stencil ruler makes it much easier for kids to draw neat, consistent circles for the body blueprint in the first step.
If you do not have one, freehand circles are completely fine. The shapes do not need to be perfect.
5 Easy Dog Drawing Tips for Kids, Step by Step
These tips are ordered so each one builds on the previous one. Following them in sequence gives the best result, especially for kids who are new to drawing animals.
Tip 1: The “Four-Circle” Body Blueprint
This is the foundation that changes everything. Every single time my daughter tried to draw a dog before learning this, she started with the nose and worked backward toward the body.
The result was always the same: she ran out of space on the paper, or ended up with a tiny body attached to a comically large head.
That is the single most common reason a child’s dog drawing looks “off.”
Starting with a structural blueprint first solves the dog body proportions problem before any details are added.
It is also the step that most clearly shows the value of working lightly with a pencil before committing to any final lines.
How to do it:
Before drawing any fur, ears, or facial features, have your child lightly draw 4 circles:
- Circle 1 (small) is for the nose.
- Circle 2 (medium) is for the head
- Circle 3 (a bit larger, placed below and slightly behind Circle 2) is for the chest
- Circle 4 (similar size to Circle 3, placed further back) is for the hips
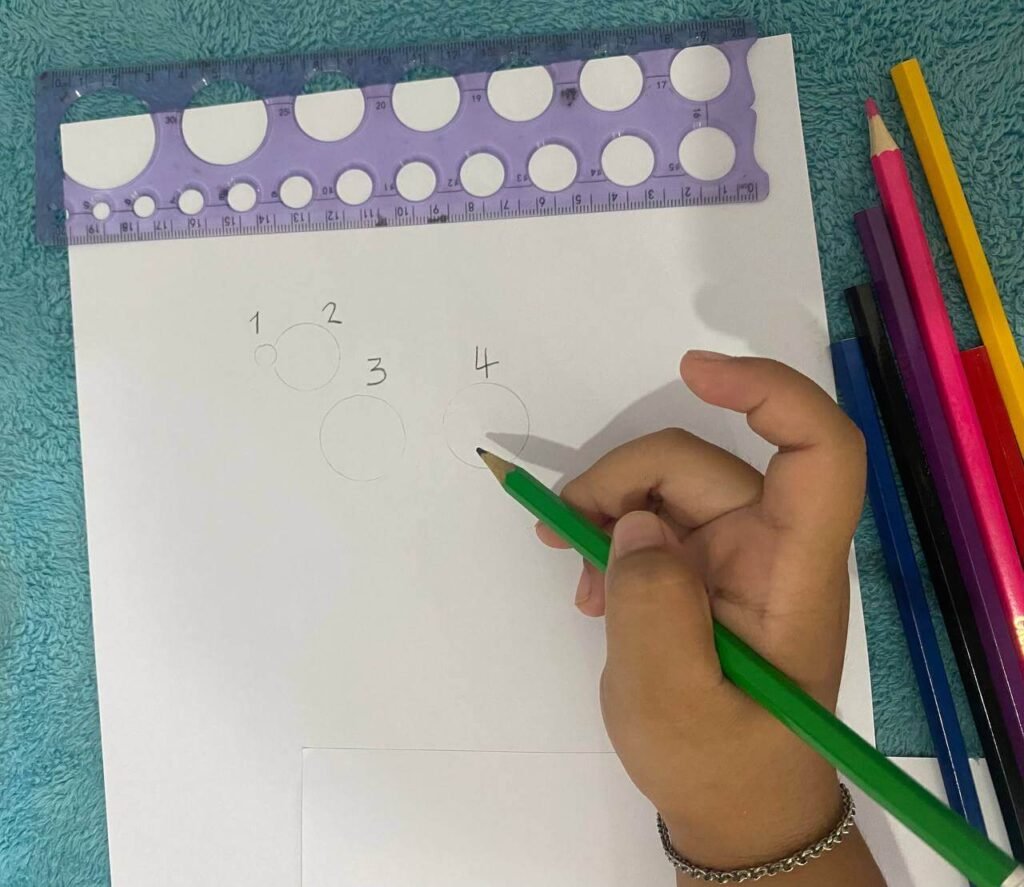
Once all 4 circles are placed, connect the chest circle and the hip circle with a gently curved line along the top of the back and another curved line along the bottom of the belly.
That is the full body shape, completed before a single detail is drawn.
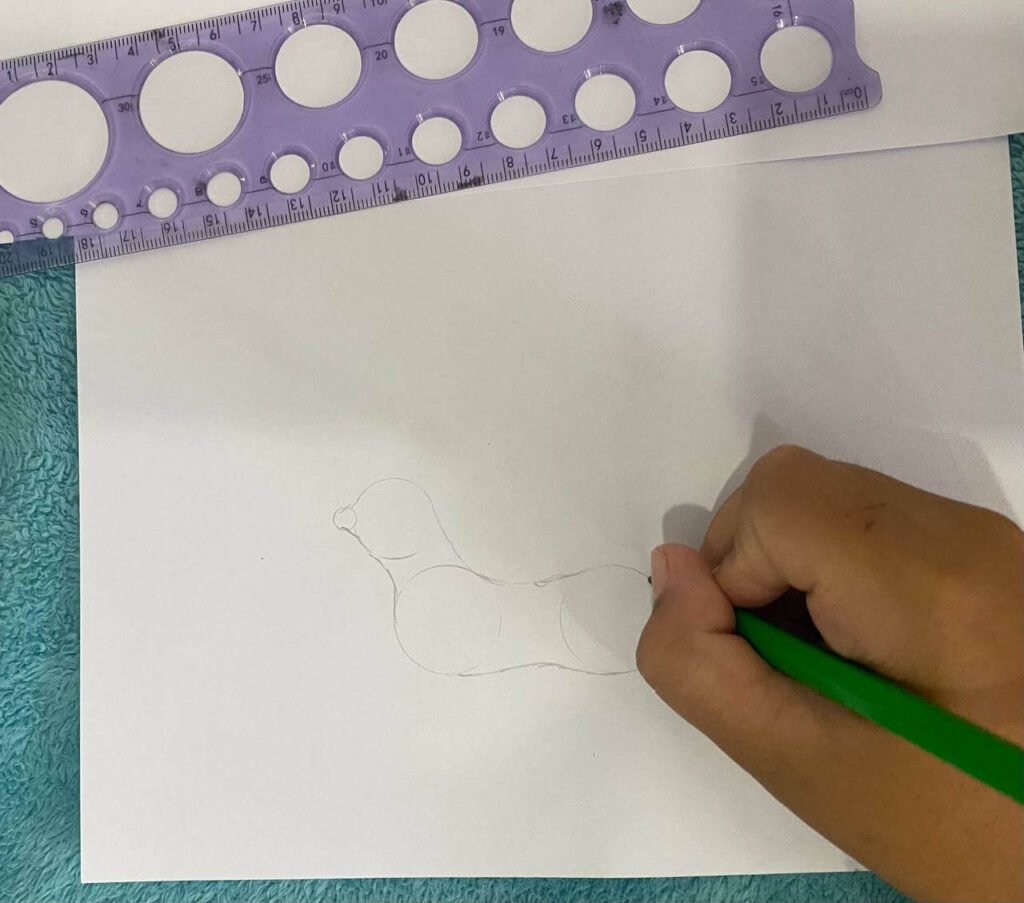
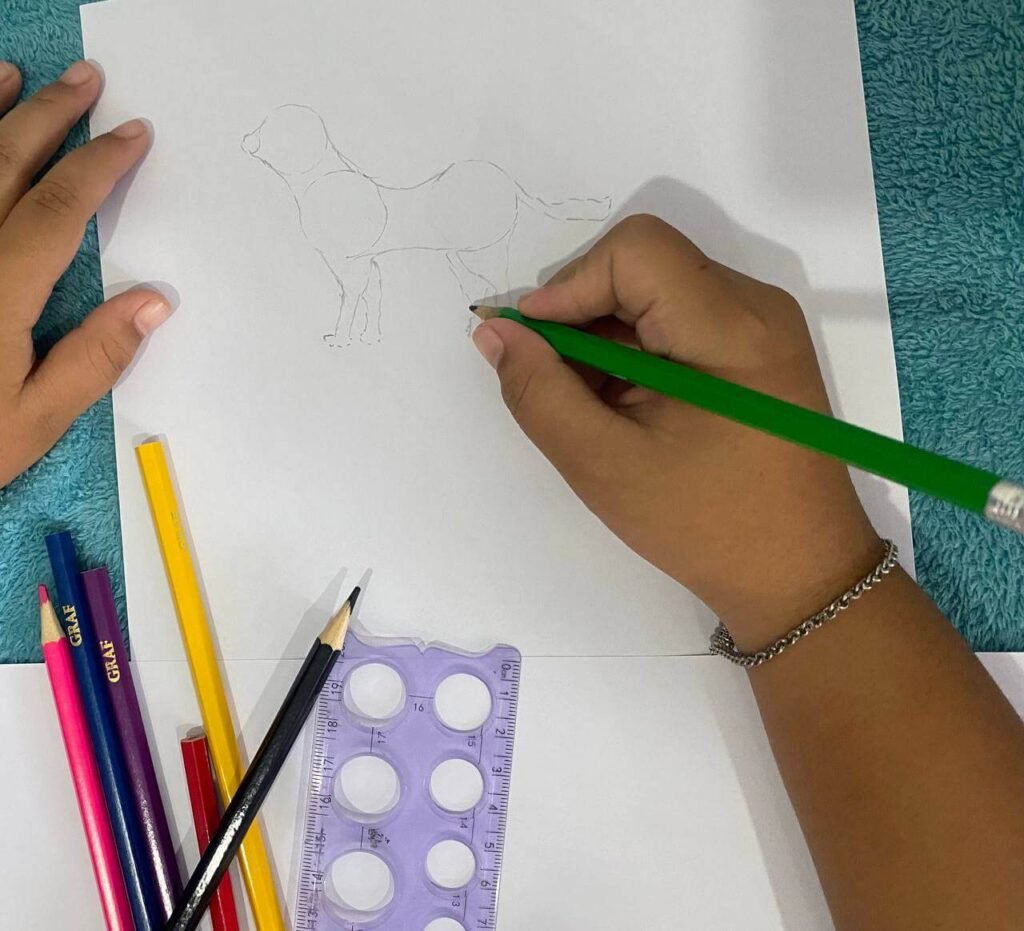
Notice in the photo how the 4 circles are spaced across the page from left to right. That spacing is what keeps the body proportions balanced.
Circle 1 (nose) is small and sits farthest left. Circle 2 (head) is beside it. Circles 3 and 4 (chest and hips) are larger and spread across the rest of the page.
Even at this early stage, the drawing already starts to look like a real dog’s body. That is exactly what this tip is designed to do: give kids a clear, structured framework before the details get added.
Tip 2: The “Whisper Grip” for Easy Erasing
This is one of those dog drawing tips for beginner kids that nobody really talks about, but it makes a huge practical difference.
When an 8-year-old is concentrating hard on a drawing, the natural instinct is to grip the pencil very tightly right near the tip and press down firmly.
That creates deep grooves in the paper that no eraser can remove, which leads directly to frustration when a line needs to be changed.
How to do it:
Ask your child to hold the pencil in the middle of the barrel, not down by the tip. The grip should be relaxed, almost like the pencil could slip out of the hand easily.
Tell her to draw as if the pencil is “whispering” to the paper.
Once she is happy with the basic shapes and the overall layout looks right, she can slide her fingers down closer to the tip and press a bit harder to define the final lines.
This two-stage approach (light sketch first, then commit to final lines) is how professional artists work.
It is a genuinely teachable habit for children this age, and it removes the “I can’t erase it!” problem almost entirely.
Tip 3: The “Macaroni Noodle” Back Legs
Out of all five tips, this one made the biggest visual difference in my daughter’s drawings. Children almost always draw animal legs as vertical tubes that go straight down, just like table legs.
It makes total sense, because that is the simplest shape. But real dogs have a skeletal joint called the “hock joint” that gives their back legs a distinct S-curve shape.
Learning how to draw dog legs that look realistic does not require any anatomy knowledge. A simple food comparison is all it takes for an 8-year-old to understand it perfectly.
How to do it:
For the front legs, your child can draw straight tubes that narrow slightly toward the paws. For the back legs, ask her to draw the shape of a thick macaroni noodle: the line curves backward first, then drops straight down to the paw.
That curved shape perfectly mimics how a real dog’s hock joint looks from the side, and it makes the drawing look noticeably more natural compared to straight-line legs.
Looking at the completed pencil sketch in the photo, you can see how much the dog already resembles a real animal, even before any coloring is added. The curved back legs are doing a lot of that work.
Tip 4: The Zig-Zag “Furry Edge” Technique
Drawing one smooth, continuous line around the whole dog makes it look like a balloon animal rather than a real dog.
This tip creates realistic fur texture in a way that is completely manageable for kids, with no complicated shading required.
How to do it:
Once the light guide circles are in place and your child is happy with the overall shape, have her trace over her favorite lines using short, quick, overlapping pencil strokes.
Think tiny checkmarks or tiny zig-zag lines along the edges of the body.
This works especially well around the neck, chest, and tail, where the marks look like little tufts of fur sticking out from the outline.
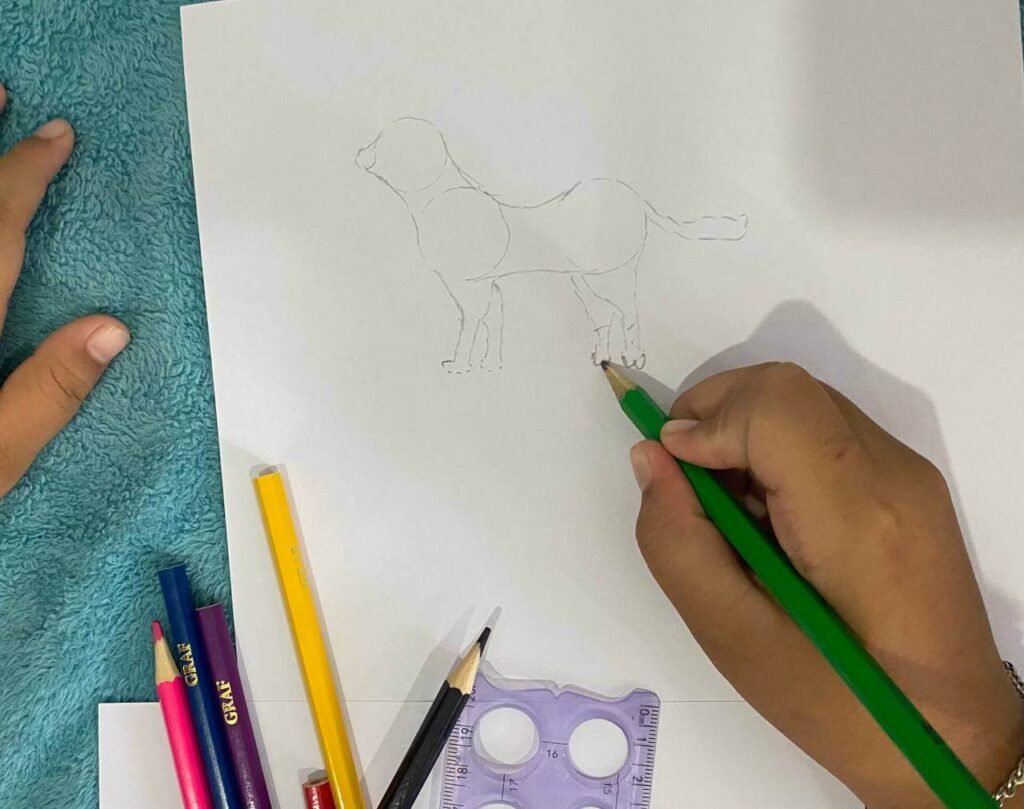
The result is a pencil fur texture drawing that looks far more polished than a smooth outline, and the technique itself is quick and easy to apply.
Kids love it because they can see the fluffy effect appear in real time as they work along the edges.
Tip 5: The “Catchlight” Eye Trick
This last tip is small, but the payoff is big. If your child colors the dog’s eyes completely solid black, the character will look flat or frozen.
Real animal eyes are naturally moist, and that moisture reflects light. Adding a catchlight is the one small detail that makes an eye look alive.
How to do it:
Before shading the eye dark, have your child draw a tiny, empty circle inside the pupil area. When she colors the rest of the eye with her pencil, she needs to carefully color around that small circle, leaving it completely white.
That tiny white dot is the catchlight, and it looks exactly like sunlight reflecting off a real dog’s eye.
Try this once, and your child will want to add a catchlight to every animal drawing going forward.
The difference between a flat black eye and one with a catchlight is remarkable.
Coloring Your Cute Dog Drawing
Once the pencil sketch is complete and all 5 tips have been applied, it is time for the most fun part.
My daughter loves three-colored dogs, so for her finished drawing, she colored the head yellow, the body pink, and the tail purple.
The whole idea was completely hers, and she was so proud of how it turned out.
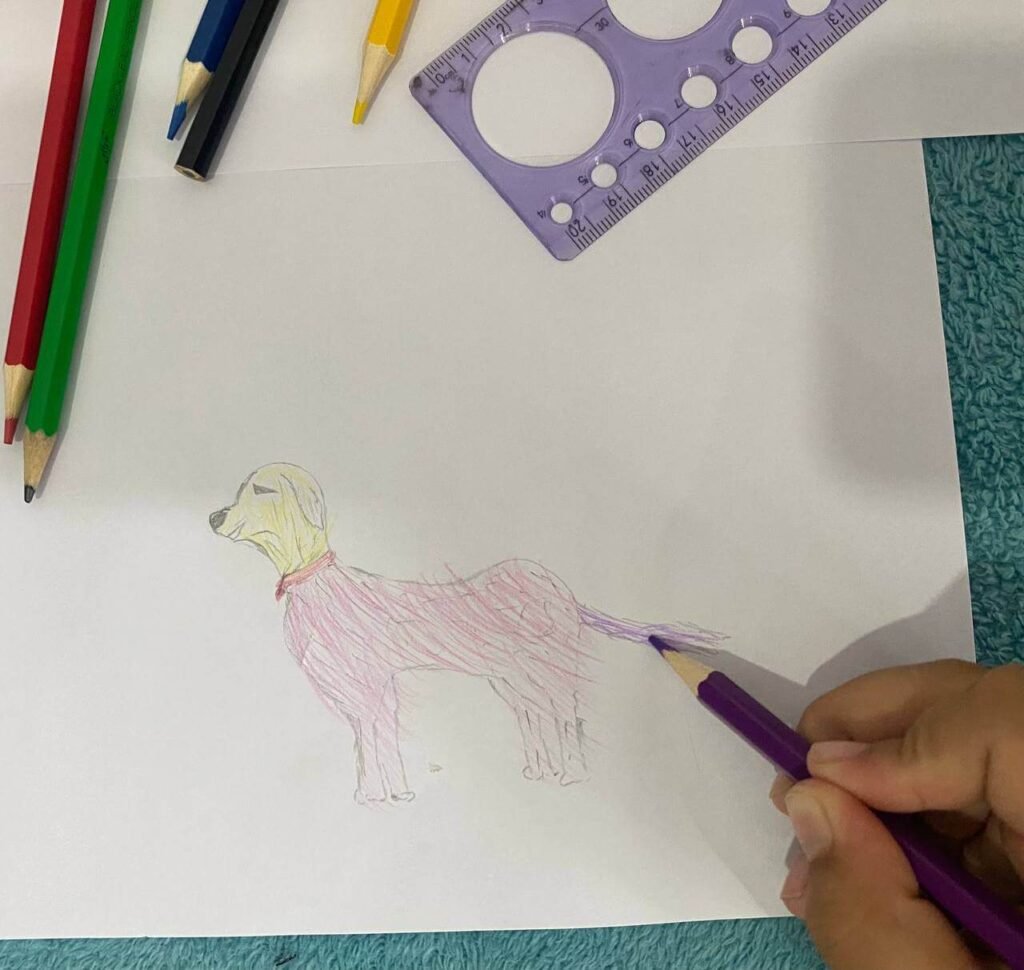
There is no rule that says a dog has to be brown or black. Giving kids the freedom to choose their own colors makes the drawing feel truly personal, and it builds a kind of confidence that more structured activities often do not.
A colorful, imaginative dog drawing is just as impressive as a realistic one. More impressive, in some ways.
Putting It All Together
These 5 tips completely changed the way my daughter feels about drawing dogs. Before learning them, every drawing session ended with erasing and frustration.
After one session working through this easy dog drawing method, step by step, she finished a drawing she was really proud of and immediately asked when we could do it again.
If you are looking for drawing activities for 8-year-olds to do at home that actually build real skills, this is a wonderful starting point.
Work through the tips in order, follow along with the photos, and keep the focus on fun rather than perfection. The skills will build naturally over time.
We will be posting more easy step-by-step animal drawing guides soon, so check back for cats, bunnies, horses, and more!
Frequently Asked Questions
What is the best way to start drawing a dog for an 8-year-old?
Start with 4 lightly drawn circles before adding any details at all. A small circle for the nose, a medium circle for the head, a larger circle for the chest, and one more for the hips. Connect the chest and hip circles with curved lines to form the body shape. This approach prevents the most common problem for kids drawing dogs, which is a head that ends up far too large for the body.
Why does my child’s dog drawing always look stiff or wrong?
Most kids draw all four legs as straight vertical tubes, but real dogs have a natural S-curve in their back legs. The other common cause is starting from the wrong part (most kids start with the face or nose instead of roughing out the whole body first). Once a child learns to draw that back leg curve, the whole drawing looks more natural right away.
How do I teach a beginner kid the right pencil grip for drawing?
Ask your child to use the “whisper grip” by holding the pencil in the middle of the barrel rather than right down by the tip. The grip should feel light and relaxed. This keeps lines soft and easy to erase during the sketching stage. Once they are happy with the overall drawing, they can move their fingers lower and press a little harder to finalize the lines they want to keep.
How can I make my child’s dog drawing look more realistic without complicated shading?
Use short zig-zag strokes along the edges of the body instead of one smooth continuous line. Focus especially on the neck, chest, and tail areas. This creates a fur texture effect quickly and easily. Also, leave a tiny white circle inside the eye when coloring it. That small white dot (the catchlight) makes a huge difference in making the dog look alive rather than flat.
Is a circle stencil ruler necessary for this tutorial?
No, it is not necessary at all; freehand circles work perfectly fine. The circle stencil ruler is helpful for younger kids or first-time drawers who get frustrated by uneven circles, but the technique works just as well without it. The important thing is placing 4 circles roughly in the right positions relative to one another, not making them perfectly round.
What other easy animal drawings can kids try after learning to draw a dog?
Once your child is comfortable with the 4-circle body blueprint method, the same approach works for cats, horses, and bunnies. Each animal has slightly different body proportions and leg shapes, but the principle of starting with basic circles before adding details applies to all of them. More step-by-step animal drawing guides for kids are coming soon!
Is this drawing activity suitable for a grade 2 classroom?
Yes, absolutely. The steps are simple enough to follow at a classroom table or desk, and the only materials needed are paper, a pencil, and colored pencils. The circle stencil ruler is a nice optional addition for classroom use. The techniques taught here, especially the body blueprint and the whisper grip, align well with fine motor development goals for that age group.
