

Hello Moms and Dads, Once Again!
After our little daughter’s success drawing a puppy, she probably wants to switch to drawing an adorable, long-eared bunny today, right?
But before letting your child grab a pencil, have you ever noticed that most kids around 8 years old tend to draw rabbits standing upright on two legs like humans, or draw their bodies way too long, like a cat? And the funniest thing is the bunny ears, which often look like two popsicle sticks stuck onto the head.
To help your daughter draw a beautiful, chubby, and adorable bunny that looks full of life, here are 5 easy bunny drawing tips for kids using simple shapes, the same practical method we used for our puppy drawing, adapted for a bunny’s very different proportions.
Key Takeaways
- These easy bunny drawing tips for kids turn a rabbit into five simple shapes: a tilted egg, folded leaves, a giant letter C, a letter Y, and a smudged circle.
- Skipping the neck is the single biggest fix for a bunny that looks “off,” since real rabbits hunch down so much that their neck disappears when sitting.
- A second inner line and one folded-down ear instantly make bunny ears look 3D instead of flat and cartoonish.
- This method works for kids around age 8 and up, and the same shape-based thinking can be reused for drawing almost any animal.
- All you need is paper, a pencil, colored pencils, and (optionally) a real leaf for reference.
What You’ll Need
- Blank white paper
- Pencil
- Colored pencils
- A real leaf (optional, but genuinely helpful for the ears)
Why These Easy Bunny Drawing Tips for Kids Actually Work
Most drawing tutorials hand kids a finished outline and ask them to copy it. That works fine until the child tries to draw the animal again on their own and forgets every line.
The method below is different. Instead of memorizing a shape, your child learns to see the bunny as a handful of familiar shapes they already know: an egg, a leaf, a letter C, a letter Y.
Once that clicks, drawing a bunny using simple shapes stops feeling like copying and starts feeling like solving a fun little puzzle, which is exactly why it sticks.
1. The “Tilted Egg” Body Shape
Real rabbits are short, compact, and very round when they are sitting. Drawing the body parts completely separately often makes the proportions look off.
How to do it: Instead of drawing three circles as we did for the dog, this time I have her lightly draw an oval tilted forward, just like an egg lying sideways on the ground, to represent the body.
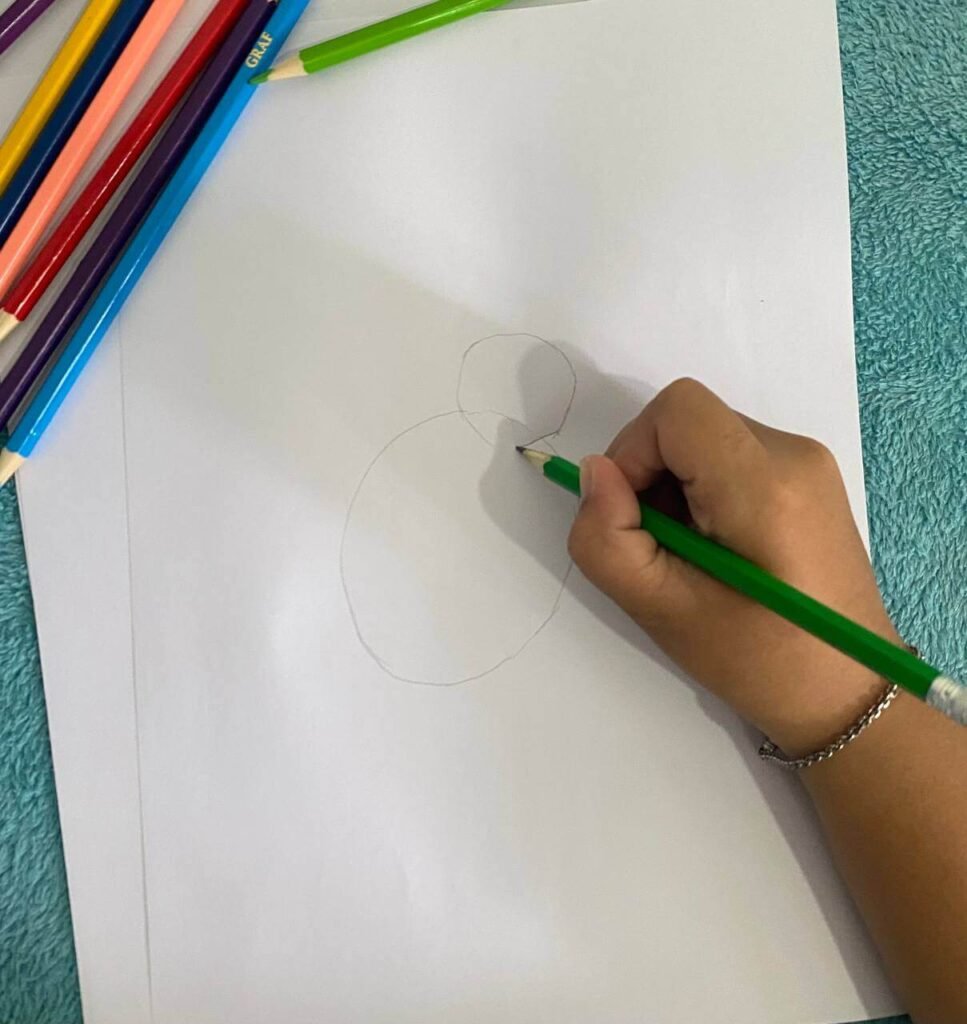
Next, she draws a small circle right on the top-front part to serve as the head.
At that moment, I tell her, “No need to draw a neck!” When real rabbits sit, they hunch down so much that their necks completely disappear.
This one tip alone is often what separates a realistic bunny body shape for kids from a bunny that accidentally looks like it’s standing up like a person.
2. How to Make Bunny Ears Look 3D: The “Folded Leaf” Trick
Real bunny ears are soft, thick, and naturally flexible. Giving the ears a 3D form will instantly make the rabbit look real, instead of like a stiff cartoon bunny.
How to do it: First, I have her draw ear shapes like long, curved leaves. She was a bit puzzled and asked, “What kind of leaf?” So, I picked a custard apple leaf to show her as a reference and explained, “A leaf with this kind of long, oval shape.” She happily replied, “Oh… drawing it like a leaf makes it so easy!”
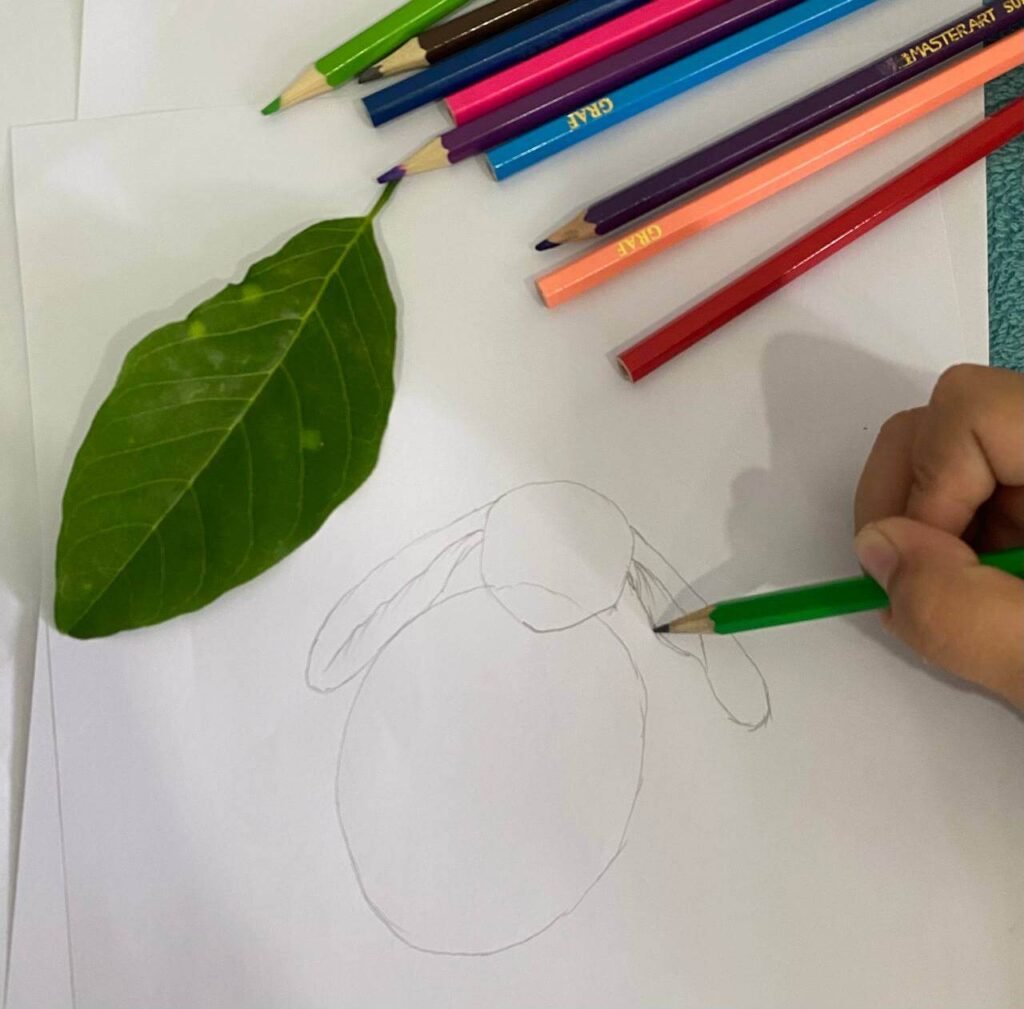
To make it look 3D, have her draw a second line inside the ear, parallel to the outer edge, but stopping halfway. This helps create the illusion of the “inner ear.” To make it even cuter, she can draw one ear folding down right in the middle, just like a bending finger.
This small trick is really the whole answer to how to make bunny ears look 3D without any shading at all.
3. The “Giant Letter C” Trick for Realistic Bunny Legs
A rabbit’s hind legs are its powerful jumping engines, but they are tucked away and hidden beneath thick fur.
If she draws four straight legs like a dog, it will end up looking like a puppy with long ears instead.
How to do it: On the back half of the “tilted egg” body, I have her draw a large backwards or reversed letter “C” facing the rear.
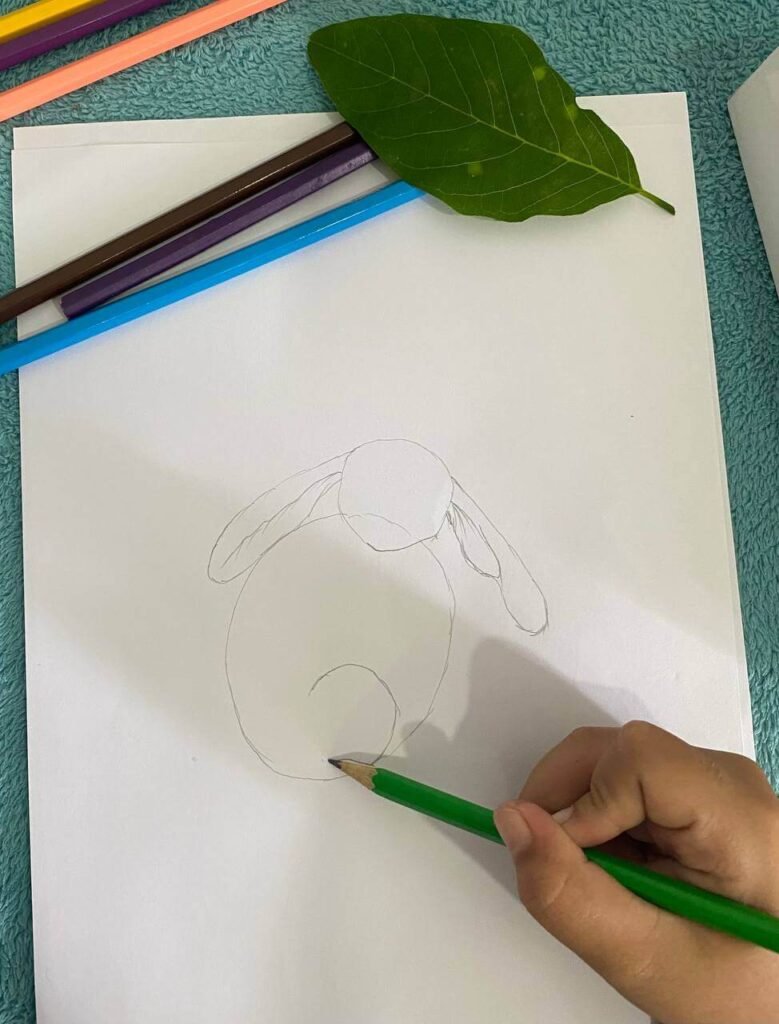
Since she found it a bit difficult to draw a backward “C,” I rotated the paper for her to make it easier to draw.
At the bottom of that “C” shape, have her draw a long, flat oval resting on the ground to serve as the big hind foot.
As for the front legs, they are just simple long shapes extending out from under the chest.
4. The “Letter Y” Snout
Understanding how a bunny’s nose connects to its mouth can be a bit tricky for kids.
If she just draws a standard curved smiley line, it might look like a human face on a bunny’s body instead.
How to do it: Start by gently drawing a tiny upside-down triangle for the nose. Right beneath the bottom tip of the triangle, draw a short straight line down, and then split it into two upward-curving lines.
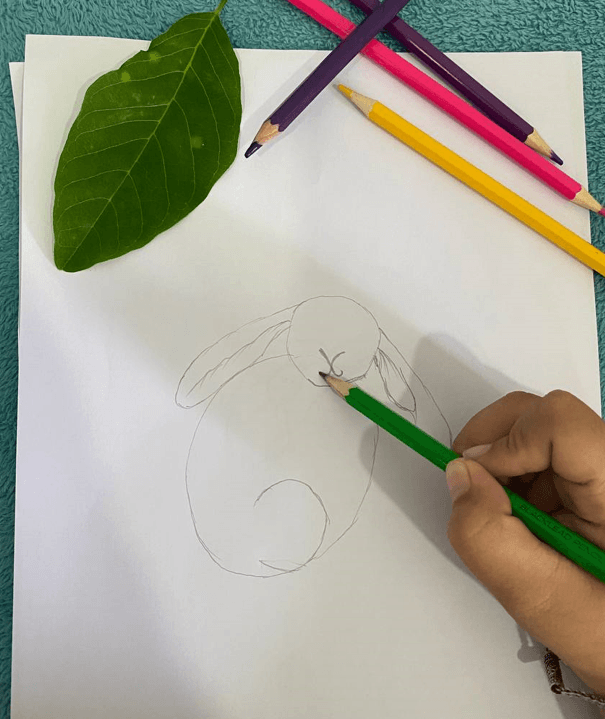
It will look just like a rounded letter “Y.” I also have her add a few light pencil dots on the cheeks to show exactly where the whiskers grow out.
5. How to Draw a Fluffy Bunny Tail With a Pencil
A bunny’s tail isn’t a perfectly solid, dark circle, and using harsh pencil lines makes it look like a hard golf ball glued to its bottom.
We want it to look soft, fluffy, and like natural cotton.
How to do it: I have her lightly sketch a small circle using the side of the pencil where the tail should go. Then, she can use her fingertip (or a rolled-up tissue) to gently smudge the pencil markings into a soft grey cloud.
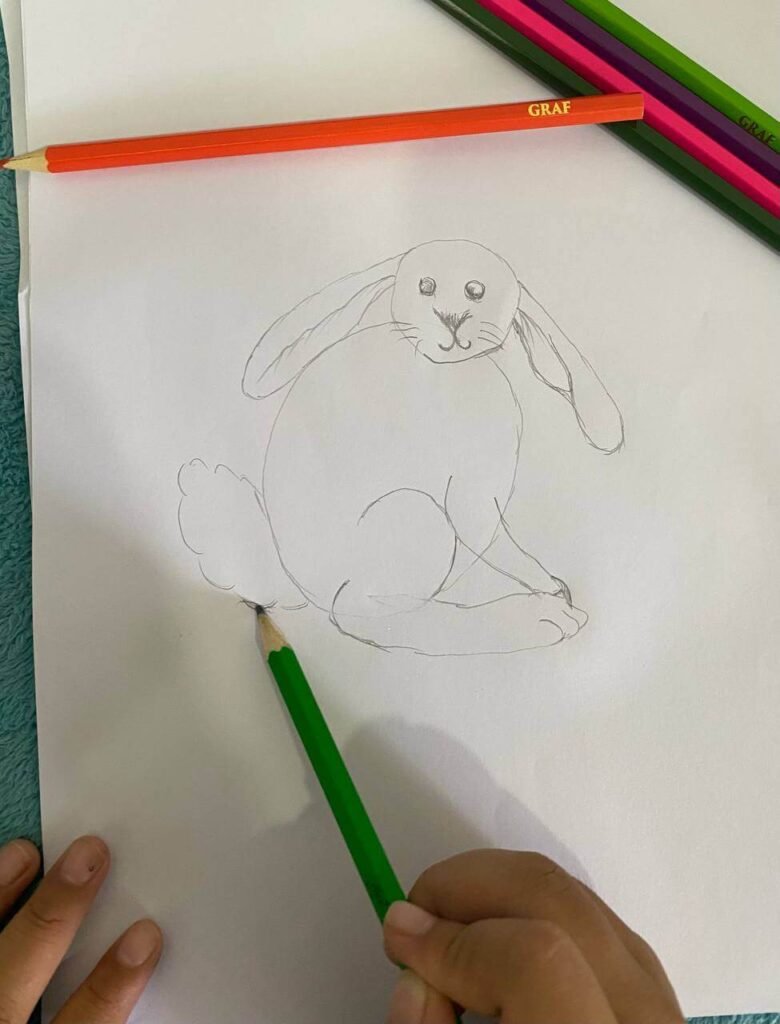
Finally, she takes an eraser to “draw” by dabbing tiny zig-zag patterns around the outer edges of that smudge.
This pulls the white color of the paper back out, creating a bright, soft, fluffy edge that looks exactly like a real cotton tail.
Coloring the Masterpiece
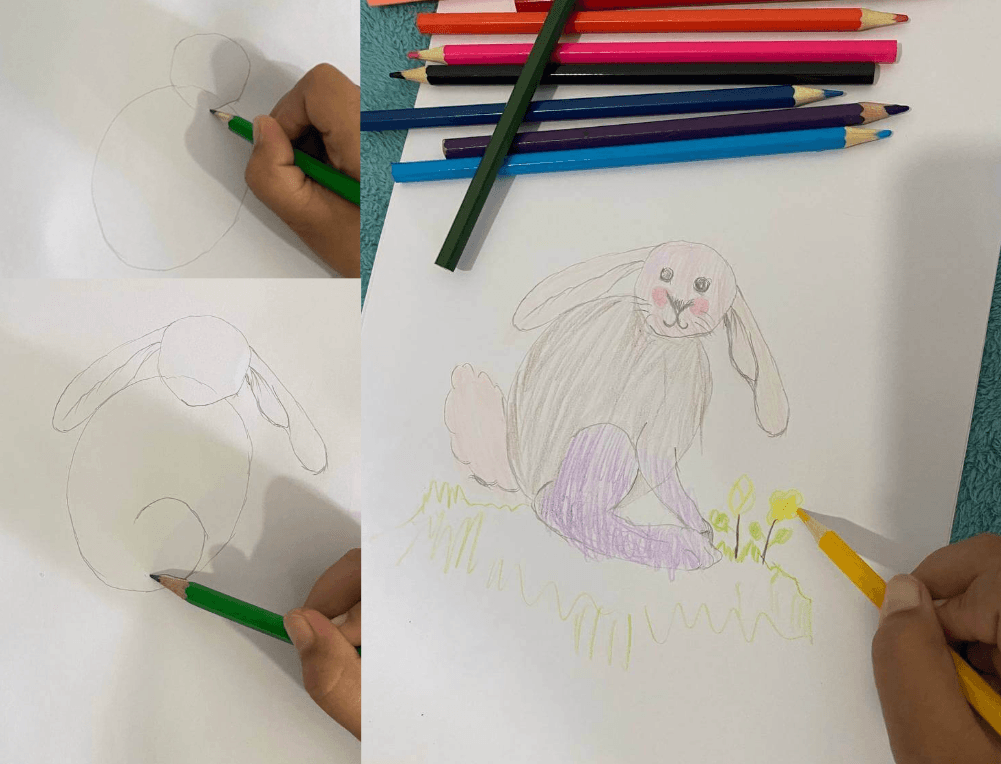
Once the drawing was complete, I asked her, “What color bunny do you love, sweetie?” She gave a short, confident reply, “I like it like this!”
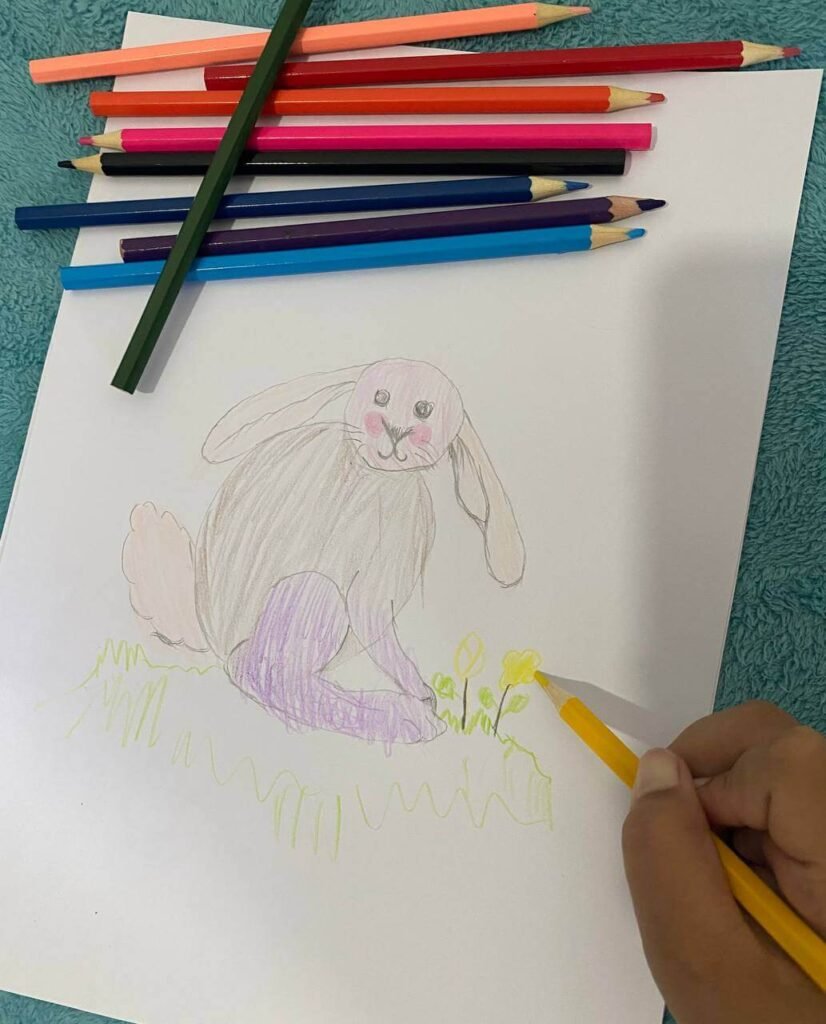
She then happily started coloring. She made the head, ears, and tail pink, added a deep, bright pink to both cheeks, and colored both the front and back legs purple.
On top of that, she drew extra grass and yellow flowers all around her bunny to make it look even more beautiful.
More Bunny Drawing Ideas for Kids to Try Next
Once your child feels comfortable with this method, it’s fun to reuse the same five shapes with small changes.
Try drawing the bunny standing instead of sitting, give it a floppy single ear like a lop rabbit, or add a carrot using the same letter Y logic as the snout.
These small variations are some of the easiest bunny drawing ideas for kids because nothing about the core method changes, only the details on top of it.
Final Thoughts
These five easy bunny drawing tips for kids are not about getting a perfect drawing on the first try.
They are about giving your child a simple way to look at a rabbit and understand why it looks the way it does: no neck, leaf-shaped ears, a letter C for the legs, a letter Y for the snout, and a soft, smudged tail.
Once your child sees the bunny this way, that chubby, full-of-life look stops being a happy accident and becomes something they can draw again and again, whenever they want.
Troubleshooting Your Child’s Bunny Drawing
Why do kids draw rabbit ears like popsicle sticks?
It usually happens because kids draw the ears as two flat, straight lines instead of curved leaf shapes. Adding a curve, an inner line, and one gently folded ear fixes this almost instantly.
How do you make a bunny drawing look 3D?
Instead of drawing flat shapes, add a second line inside the ear to show depth and fold one ear down. For the body, smudge the pencil lines on the tail with a fingertip to create soft, dimensional fluff rather than a hard circle.
What is the easiest way to draw a bunny body?
Start with a large, forward-tilted oval for the body and attach a small circle for the head directly to it—skip the neck completely. Because sitting rabbits hunch down, removing the neck instantly creates realistic proportions.
Is this method a good way to teach kids to draw animals with basic shapes in general?
Yes. Once a child learns to break an animal down into ovals, letters, and leaf shapes rather than copying an outline, the same thinking transfers easily to other animals like dogs, cats, and birds.
What age is this tutorial for, and what supplies do we need?
This method is ideal for kids 8 and older who already recognize basic letters and shapes. You don’t need special art supplies—just standard paper, a pencil, an eraser, and colored pencils. (Having a real leaf nearby helps explain the ear shape!)
